Help Centre – Mobile Paymentsback to iFAC main
Transform your smartphone or tablet into a sleek and portable point of sale system, and take payments anywhere.
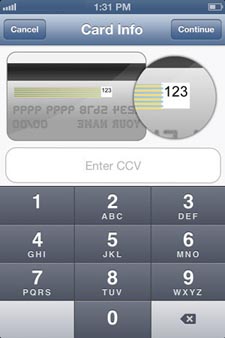
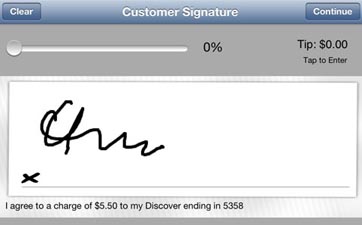
Simply download the iPhone, iPad or Android applications and plug the Beanstream Card Reader into the audio jack of your smartphone or tablet. Swipe the credit card, capture a signature, and email or print a receipt all from the convenience of your mobile device. Until you receive the reader from Fifth Avenue Collection head office, you can key your transactions into the payment application.
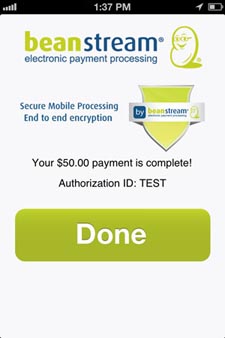
Beanstream Mobile is completely secure. No sensitive data is ever saved on your mobile device.
- 2.65% FLAT RATE - swipe or keyed transaction - this is a Fifth Avenue Collection preferred rate (simply put, standard keyed rate is always much higher as the customer credit card is not present - 3.5% + $0.15/transaction for Square, 2.95% + $0.15/transaction for Moneris, 3.30% for Intuit; can be even higher with these other processors for corporate cards).
- $0.15 per transaction
- CREDIT CARD READER - You purchase the card reader for only $29.95. No monthly fees.
- We have made it even easier for you. Fill out an online application and once approved, you are able to accept payments immediately.
BEFORE YOU GET STARTED, YOU WILL NEED:
- Your banking information found at the bottom of your cheque:
- Institution Number
- Branch Transit Number
- Account Number
- Less than 10 minutes of time to complete your application form.
- Approval takes 1 Business day or less.
- ONCE APPROVED, YOU ARE ABLE TO ACCEPT PAYMENTS IMMEDIATELY.
- Follow the simple instructions from Beanstream to receive settlement into your selected bank account.
- GO HERE FOR THE ONLINE APPLICATION FORM
- Any questions with the credit application process, just call Beanstream Support and they will be happy to help you — 1-888-472-2072
- If you are not approved on line, don't panic, just call Beanstream and ask for their Credit Department — 1-888-472-2072. They will get you set up.
Any questions, please contact jbates@fifthavenuecollection.com or call the office at 306.694.8188.
We have compiled a list of Frequently Asked Questions to help you understand why we you should use the Beanstream Credit Card reader over other readers available like Square, PayAnywhere, or Moneris.
Why Beanstream?
- You will receive the lowest rates for mobile payments; lower than Square, PayAnywhere, and Moneris.
- NO HIDDEN FEES
Despite what they tell you, other solutions hide fees and change settlement times. - NO FIXED-TERM CONTRACTS
You only pay when you use it.
No commitments or long-term contracts with each of our accounts. - NO SURPRISE CANCELLATION OF ACCOUNTS
Some providers will do a credit application only have you reach a certain amount processed per month and have been known to cancel accounts if you do not meet their merchant criteria. - NO MONTHLY FEES
No monthly minimum sales amounts and no statement fees. - NO SETUP FEES ON STANDARD PROCESSING ACCOUNTS
There are no surprise setup fees when you apply online with Beanstream. - SECURE
The reader is encrypted from end-to-end so you're safe and secure and your customer's information is safe and secure. - INTEGRATION
We will be launching other exciting tools over the next few months using Beanstream's latest solution - EXTENSIVE REPORTING
- LEADERS IN THE PAYMENTS INDUSTRY
Beanstream was acquired by Digital River in 2013- the combined companies now manage payments activities of over $20 billion in annual transactions and have over 60,000 clients worldwide. The power of Digital River’s and Beanstream’s integrated technologies will maximize your FAC business with comprehensive payments solutions.
Dependability
You get rock-solid products out of the box
- Successful swipe on the first try
- The card reader is designed to last for 100,000 swipes and is so durable it will last longer than your phone.
- Beanstream has an extensive online help centre
Expertise
Beanstream, Digital River, and Fifth Avenue Collection have been a leaders in their industry for several years, working together we will bring jewellers the latest secure technologies to help you increase your business.
-
Great Interface
- Easy-to-use, elegant, powerful, and intuitive
- iPhone (3GS, 4, 4S, 5, 5C, 5S, 6, 6 Plus) for secure sales on the go
- iPod Touch
- iPad Mini or iPad - *special note, use iPhone app on both your iPhone and iPad; iPad application not applicable to FAC
- Android (See Note for Android Devices Supported)
Security
The Beanstream team are encryption gurus. No customer data is ever stored on your mobile device.
Authentication exceeds all banking Know-Your-Customer Requirements.
-
Extras
Beanstream will go the extra mile.
- Multi-currency support – switch on the fly
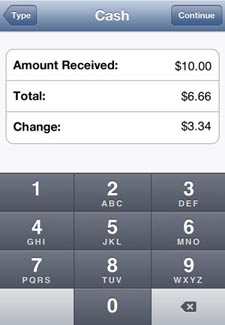
- Record cash and check sales
- Email, text, or print receipts directly from the app
- iPhone / iPad download
- Android download
- How long does it take to get set up?
- What devices support Beanstream mobile payment processing?
- Note on the support of Android devices
- Pricing
- Transaction limit increase
- Cancelling Beanstream mobile payment processing service
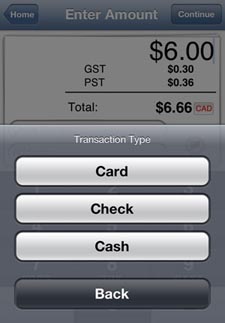
- What types of payments can I process?
- What credit cards can I process?
- Security
- How secure is Beanstream mobile payment processing?
- I lost my phone!
- Card reader
- How do I obtain my card reader?
- Setting up the card reader
- Can I use a card reader from another company?
- What if the card reader is not working?
- Downloading the app
- How do I download the app?
- Updating the app software
- Will the app work with other card readers?
- Setting up your app – transaction options
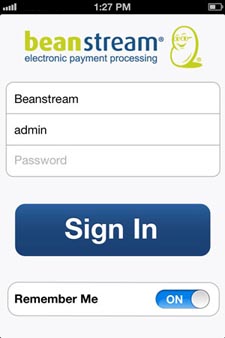
- Logging in
- Troubleshooting the app
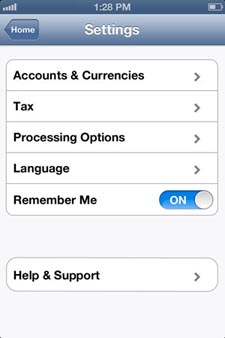
- Choosing your app settings
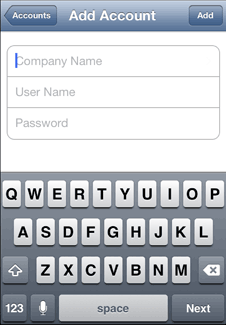
- Choosing your user account and currency options
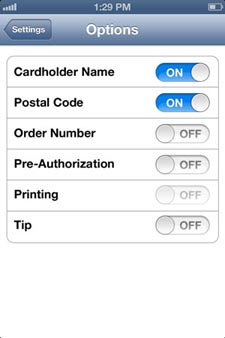
- Choosing your processing options
- Setting up your online member account
- Logging in and passwords
- I cannot log in
- I forgot my password
- Creating additional users
- Updating key contact information
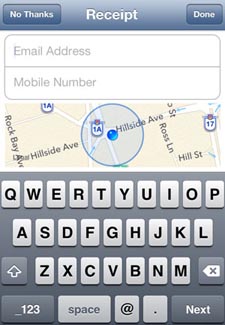
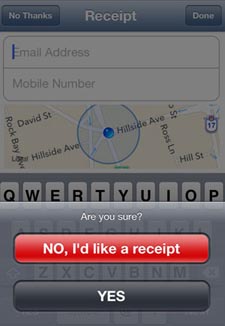
- Receipt options
- Options for sending receipts
- Geo-location and receipts
- Emailing receipts
- Texting receipts
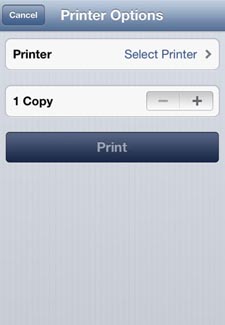
- AirPrinting receipts
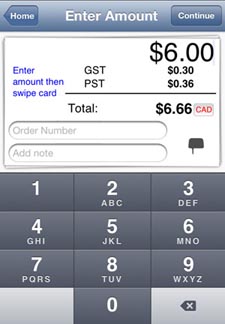
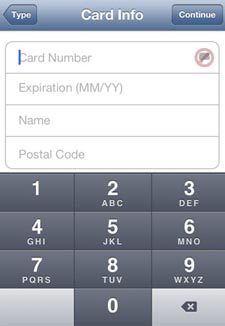
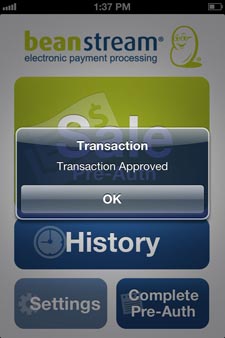
- Processing a credit card sale
- Processing a credit card sale with a card reader on an iPhone, iPad, or Android
- Processing a KEYED credit card sale on an iPhone, iPad, or Android (no card reader)
- Processing a credit card sale through the online member area
- Processing a cash or check sale
- Processing a cash sale on an iPhone, iPad, or Android
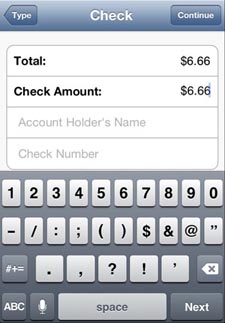
- Processing a check sale on an iPhone, iPad, or Android
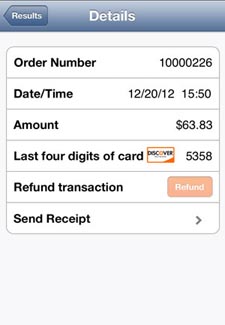
- Processing a refund
- Processing a refund on an iPhone, iPad, Android
- Processing a refund through the online member area
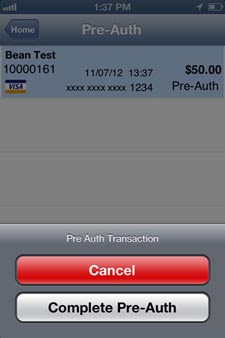
- Processing pre-authorizations
- What is pre-authorization?
- Processing the first step of a pre-authorization with a card reader
- Processing the first step of a KEYED pre-authorization (no card reader)
- Processing the second step of a pre-authorization – completion
- Processing pre-authorizations through the online member area
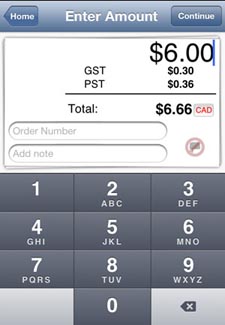
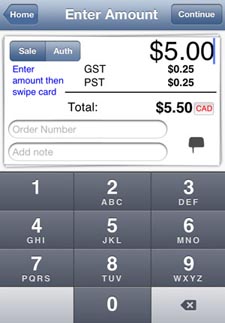
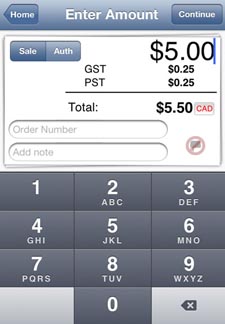
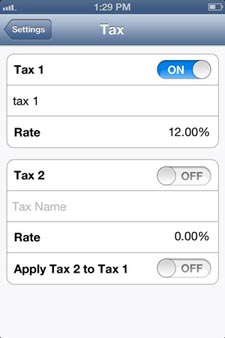
- Taxes
- Setting taxes
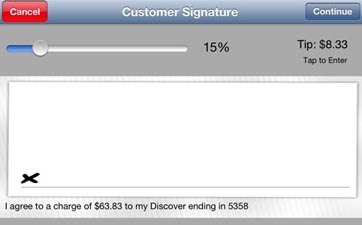
- Tips
- Enabling tips
- Receiving a tip during a transaction
- Transaction troubleshooting
- I cannot complete a transaction
- What if I receive a call during a transaction?
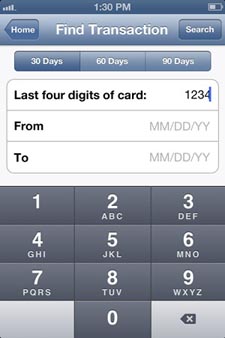
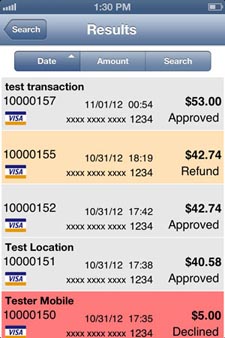
- Viewing transaction history
- Accessing transaction history through your iPhone, iPad, or Android
- Accessing transaction history through the online member area
- Deposits and banking
- How does money from my first transaction enter my bank account?
- Settlement process – where are my funds?
- How do I read my Settlement Report and Statement?
- Chargebacks
- What is a chargeback?
- Reducing chargebacks
- How do I handle a chargeback?
- What kinds of reports can I access?

Next Steps:
1. Fill out the application online from the link below. Do not use the link from Beanstream's Mobile Website or you will not receive our pricing.
2. Order reader from Fifth Avenue Collection head office once approved. Forward a copy of Approval e-mail, minus any login information, from Beanstream to natasha@fifthavenuecollection.com
We will ship the reader to you with your next order. The mobile payments readers are different as they are co-branded with Fifth Avenue Collection and Beanstream logos.
3. Download application for your mobile device.
The Beanstream Mobile App can be downloaded by accessing the following App Store links:
4. The Beanstream Mobile App can be downloaded by accessing the following App Store links:
When newer versions are available you will be able to click on a Update button through the following App Store links:
6. Set up your online account (in Beanstream’s online member area)
Sorry, Blackberry is not supported at this time.
7. Any questions, please contact jbates@fifthavenuecollection.com or call the office at 306.694.8188
 Once your mobile account is approved, you need to purchase your Beanstream card reader from Fifth Avenue Collection head office; we have co-branded our readers with the Fifth Avenue Collection logo. We will ship the reader to you with your showcase or next jewellery order.